Taking screenshots on a Mac is a quick and easy way to capture what's happening on your screen. Whether you need to document an error message, save a funny conversation, or document a process, a screenshot is a useful tool. And the good news is that Macs have several built-in options for taking screenshots, so you can choose the one that best fits your needs.
In this article, we'll explore all the different ways you can how to take a screenshot on a Mac, including how to capture the entire screen, a specific area of the screen, a specific window or menu, and how to copy the screenshot to your clipboard.
So if you're ready to learn more about taking screenshots on a Mac, let's get started!
How To Take a Screenshot On Mac?
Screenshots are an essential tool for many computer users. Whether you need to capture an error message, document a process, or save a funny conversation, taking a screenshot is a quick and easy way to capture what's happening on your screen. If you're a Mac user, you have several options for taking screenshots, and in this article, we'll explore all of them in detail.
1 . Screenshot the entire screen
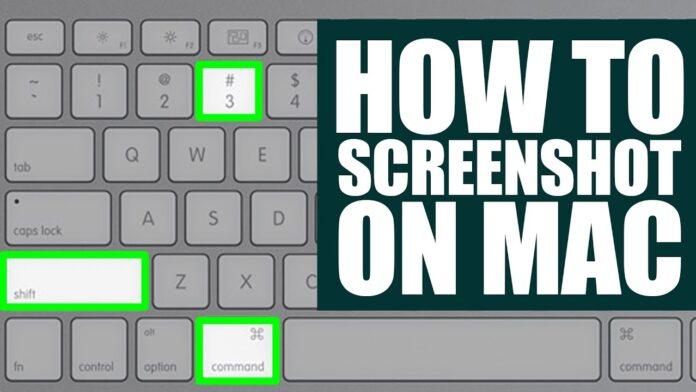
The most basic way how to take a screenshot on an Apple Mac is to capture the entire screen. This is useful if you want to document everything that's currently visible on your screen, including your desktop and any open windows. To take a screenshot of your entire screen, follow these steps:
- Press
Shift+Command+3on your keyboard. - The screenshot will be saved to your desktop as a .png file, with the file name "Screen Shot [date] at [time].png."
That's it! The screenshot will be saved to your desktop automatically, and you can open it in any image viewer or editor to view or edit it.
Read More : How to Download an Instagram Profile Picture in 3 Easy Steps
2. How to Take A Screenshot a specific area of the screen
On Mac
Sometimes, you may not want to capture the entire screen. Maybe you only need to document a specific part of a webpage, or maybe you want to crop out unnecessary details from a screenshot. In these cases, you can use the "screenshot a specific area" feature to capture only the part of the screen you need. To take a screenshot of a specific area of your screen, follow these steps:
- Press
Shift+Command+4on your keyboard. - Your cursor will turn into a crosshair.
- Use the crosshair to select the area of the screen you want to capture.
- Click and drag to select the area you want to capture, then release the mouse or trackpad button.
- The screenshot will be saved to your desktop as a .png file, with the file name "Screen Shot [date] at [time].png."
As with the "screenshot the entire screen" feature, the screenshot will be saved to your desktop automatically, and you can open it in any image viewer or editor to view or edit it.
Read More : 9 Easy Steps To Change Email On Instagram

In addition to capturing specific areas of the screen, you can also use the "screenshot a specific window or menu" feature to capture only a specific window or menu. This is useful if you want to document a specific application or dialog box, or if you want to crop out unnecessary details from a screenshot. To take a screenshot of a specific window or menu, follow these steps:
- Press
Shift+Command+4on your keyboard. - Press the space bar.
- Your cursor will turn into a camera icon.
- Move the camera icon over the window or menu you want to capture.
- Click to take the screenshot.
- The screenshot will be saved to your desktop as a .png file, with the file name "Screen Shot [date] at [time].png."
As with the other screenshot features, the screenshot will be saved to your desktop automatically, and you can open it in any image viewer or editor to view or edit it.
Read More : How To Turn On The Flashlight In IOS-Updated 2022
4. Copy the screenshot to the clipboard
By default, Mac screenshots are saved to your desktop as .png files. However, you can also copy the screenshot to your clipboard, which allows you to paste it into any application that supports images. This is useful if you want to quickly insert
Note: If you are using a MacBook with a Touch Bar, you can also take a screenshot by pressing Shift + Command + 6 on your keyboard. The screenshot will be saved to your desktop as a .png file.
Conclusion
In conclusion, How to take a screenshot on a Mac is a simple and convenient way to capture what's happening on your screen. Whether you want to capture the entire screen, a specific area, a specific window or menu, or copy the screenshot to your clipboard, Macs have several built-in options to choose from.
By following the steps outlined in this article, you should be able to easily take screenshots on your Mac and use them for a variety of purposes. Whether you're a beginner or an experienced Mac user, learning how to take screenshots is a useful skill to have in your toolkit.
FAQ
- How to Take a Screenshot on a Macbook Laptop 2023
To take a screenshot on a MacBook laptop in 2023, you can follow the same steps as listed in my previous response. To summarize, here are the steps to take a screenshot on a MacBook:
- To take a screenshot of your entire screen, press
Shift+Command+3on your keyboard.
2. How to Take a Screenshot on a Macbook Air
- To take a screenshot of your entire screen, press
Shift+Command+3 or 4 or6 on your keyboard.
3. How to Take a Screenshot on a Macbook Pro
- To take a screenshot of your entire screen, press
Shift+Command+3on your keyboard.


